Showing posts with label Utrecht. Show all posts

Friday, June 20, 2014

Art In A Vacuum or Creative Community?

To feel like you're not creating art in a vacuum, it's important to connect to a creative community. Besides the connecting we do online through social media activity, where many of the people we meet are in far-flung places, I find it's gratifying to build local relationships with other artists, cultural support groups, universities, schools, museums and art supply stores.


Utrecht/Blick in Fort Lauderdale, Florida, has been my local art supply store since they opened. I spend many hours in the store perusing on an almost weekly basis and have gotten to know well the store manager, Serafima, and her staff. Before Serafima became manager, I became friends with the previous store manager, Corinna, who is now in the Miami store. I have offered my time to both of them and done many art demonstrations over the years in their stores.

A few days ago I found myself heading to Miami to drop my daughter off for the day. Rather than take the long drive back home and have to return round-trip again later, I decided to stay in Miami and brought some art supplies along in the car to be sure my time waiting would be productive. I am always mesmerized by "public" painters, so thought a plein air painting session would be fun.


That afternoon I had the option to go to the beautiful Fairchild Gardens to paint, or, I thought, what about seeing if Corinna at the Miami Utrecht/Blick would allow me to set up a table inside the store to paint in the comfort of air-conditioning and share my painting passion with her customers? She and her staff graciously invited me in, so I spent a delightful afternoon with them sketching in Pastels, playing with Oils, and sharing my knowledge and techniques with their curious customers.

 Painting in Blick Miami store with dry pastels.

Dry pastel sketch on mixed media paper.

Abstraction of above photo with dry pastel on mixed media paper.

Starting another dry pastel painting on ArtSpectrum colourfix pastel paper.

I highly recommend if you haven't already taken the opportunity to make art in public places that you give it a try. Take a look in your community for potential art-friendly locations - restaurants, hotels, a local art guild, art supply stores, area art-walks or any place that would like to bring interest to their customers. Get creative and think outside the box! 

Then, simply ask. Don't take a "no" as a personal rejection, just keep trying. In the mean time, practice painting or drawing in front of people by setting up outside in a park or on a bench along a public road with lots of foot traffic. In no time, you'll become great at painting and talking about it at the same time in front of strangers... and may even find some fans! Be brave, put yourself out there, build relationships and experience how enriching your creative community can be.

HAPPY ARTING!  Tristina  :D

Wednesday, April 10, 2013

Encaustic Kitchen Mixology

When I first read books about encaustic wax painting, they all mentioned that it is economical and advantageous based on your painting needs to make your own encaustic medium from beeswax and damar resin... Right! I figured I would never need to take the time to make my own medium because it would surely be readily available from my local art supply stores... Wrong! In a desperate pinch, I found myself having to work some kitchen magic to make encaustic medium for a class I was teaching. Now I no longer tremble in fear. It's really quite simple!


I grabbed the kitchen supplies from KMart - candy thermometer, 4 quart saucepan (I recommend one with side pouring lip(s)), a small metal strainer, tight woven cloth for straining (like organza) and a cookie sheet or ice tray... preferably a silicon one! I found some great silicon King Cube ice trays at Ace Hardware to help with easily popping out the cooled blocks of medium. SCORE! :)


If you haven't already, grab Linda and William Womack's book, Embracing Encaustic; they have an easy to understand recipe and great pictures to help you along with the making encaustic medium process. The formula simply uses white beeswax and damar resin (not damar varnish!). The resin looks like light colored chunks of amber and is quite hard. I found the Jacquard beeswax at Jerrys Artarama. Sometimes you can find the beeswax and resin at Pearl Paint, and Utrecht as well - look for it in the oil painting area.

Making the encaustic medium in your kitchen is so easy. I usually use 2 pounds (2 bags or 32oz) of white beeswax and 4 ounces of damar resin. I make sure to turn the stove top extractor fan on high, then throw in enough beeswax to cover the bottom of the pan to at least 1/8 of an inch, bring it to 175 degrees F / 80 degrees C on a burner and wait for it to melt - swirl the candy thermometer around in the wax and watch the temp carefully. When all the wax in the bottom of the pan is melted, I add all 4 oz of the damar resin at once and raise the temp to 220 degrees F / 105 degrees C. The resin will begin to sizzle and pop...this is ok! Swirl the resin and small amount of wax around until the resin is liquefied (this could take up to 15 min)  then pour in the rest of the 2 pounds of beeswax. Turn the temperature back down to 175F/80C, put the lid on the pot, and keep an eye on the melting, occasionally stirring with the candy thermometer.


 It can take a half an hour or more for all the wax to melt. When all in the pan is liquefied, use the candy thermometer to swirl together the ingredients. Pour the liquid medium out of the pan, through the fine cloth (like organza) and through the metal strainer into the cookie sheet or ice cube tray. Set aside to cool.


If using a cookie tray, cut the medium in squares with a knife while still warm. After the medium cools, pop out of the blocks of finished medium...if they are difficult to get out, put the tray in the refrigerator or freezer for 5 to 10 minutes, the flip the tray over and bang on the back. All will pop out easily!


Now that I have made encaustic medium several times, I wonder why I ever stressed so much about doing it. Is there something you have avoided doing along your artistic journey that you can try soon in order to overcome your fear? Thanks for sharing the activity you attempted and conquered with me and other readers in the comments below...

HAPPY ARTING!      Tristina

Tuesday, August 21, 2012

Create from the heART

As I mentioned in my last post, I have been maniacally inspired lately to create my most fun pieces to-date by Mary Beth Shaw's latest book, "Flavor for Mixed Media". Here is one of the paintings on paper created over the past few days incorporating white Gesso, liquid Matte Medium, Rowney and Faber-Castell Dry Pastels, Pan Pastels, DecoColor acrylic paint pens, Sakura Gelly Roll pens, Speedball Calligraphy inks, Koh-I-Noor Trans-Mix acrylic inks, Sakura Micron and Graphic #1 pens, Sennelier Oil Pastels, and ephemera (re-purposed paper) - truly a "mixed-media" piece:


The unusual shape of the paper you see above is from some fabulous watercolor blocks that I found at Pearl's; I am so excited by the long, skinniness of it! The paper is called Fluid Watercolor Paper and comes in the interesting sizes of 4x8, 6x12, 6x18, 8x20 and 8x24, as well as others. What I really appreciate about the blocks is that they are only glued on the long sides, so the advantage of not having to size the paper (wet the paper and allow it to dry) before painting is great and yet they are super easy to separate from the block when you are done by shoving a palate knife in one of the short ends and running along the long side.


I went in Pearl's again this past weekend and inquired how best to do-it-yourself frame these paper works of art (I usually paint on Artist Panels or Gallery Wrap canvases, so those are easy to wire up for hanging). I collected the materials needed and will show you what I do to mount these latest paper works when I figure it out! There are several Art Competitions coming up in the next few months that I am choosing to submit these paintings to, so making this happen is now a priority. :)

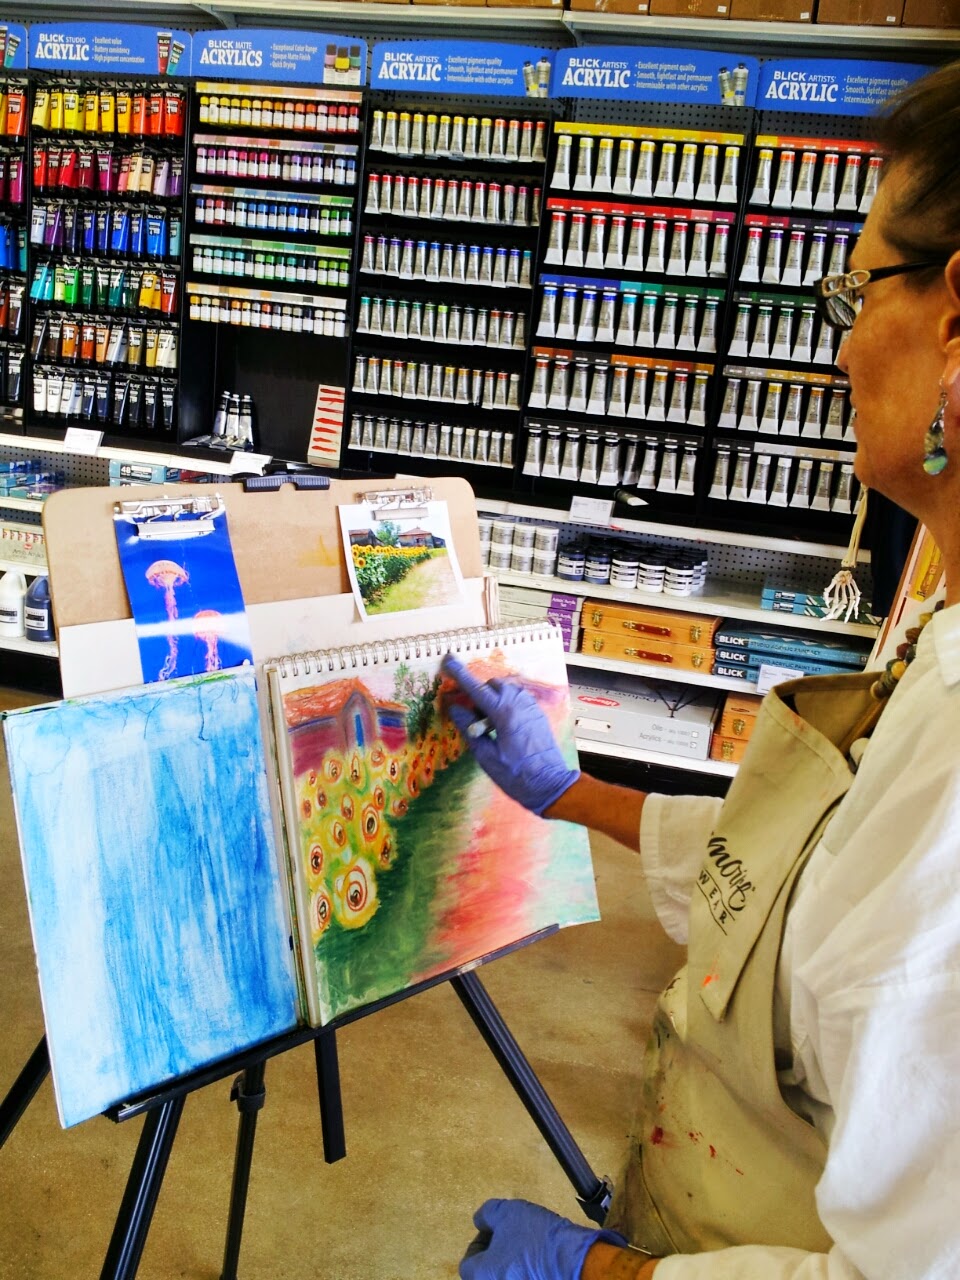
Here are a couple pictures of the process I have been in lately:


I'm working on about the 6th / 7th painting in this series and found today I was getting a little "stuck" in my design elements rather than having the ideas flow. Do you ever find yourself staring at a begun painting and wonder what to do next? I like to take a break when this happens and flip through art books for shape/color/concept ideas to move me along. Today I was reading from the art book, "Mixed Mania -  Recipes for delicious mixed-media creations" by Debbi Crane and Cheryl Prater, and found a spot-on quote  from famous artist Marc Chagall, "If I create from the heart, nearly everything works; if from the head, almost nothing." When I find myself thinking too much about a painting, I have to take a break, grab a snack or cup of coffee, refer to the thousands of photographs I have taken that are safely archived on my computer ready at my whim, read an art book with lots of pictures (we are working in a visual medium after all!) and come back to the work with a clear & fresh enthusiasm to be fearless in trying ANYTHING! When I hesitate to act, I remind myself that what I am doing is not so precious and I can always work OVER it or tear up the result and use pieces in other works if I'm not happy with the results...

Here's a glimpse of my work table as I was finishing up the above painting... messy, huh?


I love it when my working on art-making inspires my daughters to break out a journal or canvas and do their own work (one advantage to working on the kitchen table)! I buy hard canvas boards and artist panels when they are on sale at Michael's and Utrecht so they are always on-hand to grab when the inspiration strikes. In my home, none of my supplies are off limits; I want the girls to experiment and discover the joy of working with student and professional grade products and tools so they can see and appreciate the differences, giving them the knowing as they walk into the future of exactly what to use to get their desired creative outcome. Here is what they have done in the past week:

Devon (age 13) Oil Pastel

Samantha (age 16) Acrylic

I hope this article inspires you to pick up an art book, peruse the pictures, experiment with new materials and jump-start your next creative project. Please link to the art you create in the comments below so that we (myself and other followers in the art community) see your unique expression. Remember to share your art; I guarantee it will inspire others to joy in many ways!

Happy art-making!!! :D  Tristina

Thursday, August 9, 2012

Bitten by the Bug!

It doesn't happen to me very often...I've read the gambit of art how-to books. Interesting, fun, a few ah ha moments here and there... But, I've become obsessed with the projects in the new book I just got in Michael's last week called, "Flavor for Mixed Media" by Mary Beth Shaw.

Below are the 3 pieces I created from Mary's first project in the book, "Painting Without Paint" (all on 12x12 Clayboard done together in a left to right series):


There's something about drippy drips that totally turns me on!


This book is filled with so many new techniques I haven't thought of using before, although I have all the supplies in my studio already. Mary Beth has me digging up my dusty dry pastels, slopping on the gesso, re-pumping my DecoColor paint markers, and using my luscious acrylic/alcohol inks in whole new ways! Her illustrations of the steps involved with creating her ethereal abstract paintings are spot-on and really have stretched my creative muscle. I have been painting almost non-stop (except for the trip to Pearl Paint and Utrecht to buy more supplies) for the past 4 days. HEAVEN!!!

Even though I have heard taught to me before (as I'm sure you have, too) to lay FAT  OVER  LEAN when painting with multiple painting mediums, I never really got it until Mary Beth showed and explained it to me in her book. She gave me cause to break out my fancy silky Sennelier oil pastels and dry highly-pigmented Pan Pastels and smoodge them all over the top layer of my new (paint-less) paintings...Fascinating.

I will have more paintings to show you from later projects in Mary Beth Shaw's book when I put the finishing touches on them. Happy Painting!  Tristina

Sunday, January 22, 2012

Love Charcoal!

There's just something about the messiness and feel of holding a charcoal stick in my hand that I love! Maybe the smokey smell too of the vine charcoal...


Recently I picked up a large stick of charcoal at my local Utrecht art supply store and decided to turn it to making a quick Zentangle(tm) sketch using some of the designs found in the new Zentangle 6 book.


Love the smudgy property of the charcoal and used a damp paper towel to smudge in places to get some depth and accents going. After creating this work I found anything that touched it or that it touched ended up with charcoal on it, so 2 coats of workable spray fixative were used to seal in the charcoal.

I find that whenever I am working on an art project, it inspires my 12 year old daughter to work on a project of her own. Here is what she recently created when we were Art Making:


If you get up close at the top of her page, you can see in green the names of famous Creatives like Walt Disney, Einstein, Martin Luther King, Thomas Edison, etc. Very cool!

So in the famous words of a young Creative, "Dream Big, Be Creative, Walk Among the Stars!" ;) Tristina

Friday, December 30, 2011

Get Your Art On!

Hope my readers are having a relaxed Holiday! Enjoying lots of pictures and experiences (and scraps of cool present wrapping paper) to ad to our artwork...

I got "the Cloth Paper Scissors Book" last week...full of INSPIRATION. Editor Barbara Delaney was tasked with selecting an assortment of articles from past issues of the magazine, with some extra tips and resources thrown in for us loyal readers.

So far I have read Jodi Ohl's "beginner's guide to BEGINNING" chapter. An excellent place to start at the New Year with the inspiring words, "Make a commitment to do something, anything, every day to make your creative life a real part of your daily routine." A great reminder to me that no matter where else my life is pulling me - kids school and activities, work, divorce, parents, teaching, etc. - I'm choosing to carve out time each day to be creative for ME (what a concept).

My favorite part of Jodi's chapter is her "TIPS to get you started" column. This includes the idea to enlist some of my creative friends to have a regular art play date, begin an online blog (ala ArtBookBug), take pictures when I have a dry spell (got a new kickass camera for my birthday in Nov - thanks Tim!), and think about working in themes or collections to build a "body of work" (I'm finding this is soooo important), plus a lot more ideas, including "How to start?". Her wise words for us living the creative life, "I only manage doing it all by simply doing." My words...decide SOMETHING to do and (like putting one foot in front of the other) manage at least a small move forward every day!

My creativity takes on many forms; sometimes just being able to take 15 minutes to read an artistic book or magazine to feed my brain, drawing zentangle(r) patterns or pictures that only require a pen and piece of paper, to full out days that I give myself about once a month to spend 4-8 hours straight pulling out all the stops in my studio with my papers/paints/mediums/inks/hard and soft canvases/encaustic wax/colored pencils and markers/and on and on! Please comment with your favorite creativity times/activities/supplies...

Here are my latest Zentangles(r):
 This is done on a watercolor postcard, so can be sent through the mail.
This is done on an Artist Trading Card (ATC).

By the way, thank you to all who gave me gift cards to my favorite Utrecht art supply store this Christmas! :)

Here's to making achievable artistic goals for 2012. ENJOY  THE  PROCESS and APPRECIATE THE AMAZING PEOPLE YOU WILL MEET ALONG THE WAY!!!

HAPPY READING AND CREATING ;)   Tristina

Monday, November 21, 2011

Fuzzy Headed

I was texting a friend of mine in the morning after dropping off the kids at school. She misunderstood something I had said and apologized for "being silly". I assured her that I share her same "early morning child induced intoxication" and am usually quite fuzzy headed myself until about 10am!

That being said, here is another of my recently finished Zentangles. I usually work on these in the morning when I just need to zone out till my body pumps enough blood to my head to be able to think cogently. :)


This Zentangle includes KurlyQ, Dropletts, Sprouts, Bricks, In N Out, River, ChainGang, Spinners, Portholes, Yimkin and a few others I don't remember the names of off the top of my head!

I will be hosting a Zentangle Artist Trading Card (ATC) demonstration at the Utrecht Art Supplies shop on North Federal Highway in Fort Lauderdale (next to the Whole Foods) on December 17 (Sat) from 1-3pm. Bring your blank ATC's (Smooth Bristol are best for this project) and Micron pens or purchase them at Utrecht just before the demonstration. Completed ATC's will be put on display in the shop for other customer's viewing pleasure. Should be a very fun and relaxing primer to the holidays!

To learn more about Zentangles, go to Zentangle.com or TanglePatterns.com. I will be going to class to get my "Certified Zentangle Trainer (CZT)" in Rhode Island in February... I'm a Florida girl, what am I thinking???

Cheers to your relaxing this Holiday Season. Happy Turkey - Thanksgiving - Day!  Tristina

Saturday, July 9, 2011

Polymer Clay Class Today!

Today I am giving a free demonstration of working with polymer clay in the afternoon at Utrecht Art Supply in Fort Lauderdale, FL! Have clay, tools, oven, lotions & potions all over my kitchen table in preperation. Will let you know how class turns out... :) Tristina

Tuesday, May 17, 2011

Makin' Paper!

It was a beautiful sunny South Florida day yesterday, so I was outside on my dock watching the boats go by and making colorful sky dyes papers (inspired by Mickey Lawler's book for coloring fabric, 'SkyDyes'). Here's a peek at the process...


The bright sun dries the watery acrylic paints within 2 hours, so I can make more than one batch in a day. Yesterday I made 2 large sheets (22"x30") on rice papers that I had gotten at Utrecht on Saturday and one sheet of 20"x20" on tissue. Over the next few days I will use Golden's Soft Gloss Medium to adhere them to canvases and fill in any tears with NeoColorII water soluable wax pastel crayons. Don't worry, I'll take pictures and show the finished paintings here when they're done!

The Broward Art Guild has a coffee shop sporting blank walls to fill with paintings for sale, so I'm making these to put on their walls for the month of June. Feels good to have my paintings 'out there' for folks to see.

Tristina  :)